認識 Ameba 開發板
-
Ameba 是由瑞昱半導體 (Realtek) 推出的開發板,搭載強大的 ARM Cortex-M 核心,並整合雙頻 Wi-Fi 與藍牙通訊。它支援 Arduino IDE 開發,具備豐富的 GPIO 介面與低功耗特性,非常適合作為物聨網的感測裝置。
本課程(2026)採用最新系列 AMB82-mini ,其內建 AI 硬體加速與影像編碼,能實現邊緣運算的人臉或物件辨識,是建構智慧監控、物聯網與 AIoT 專案的首選。
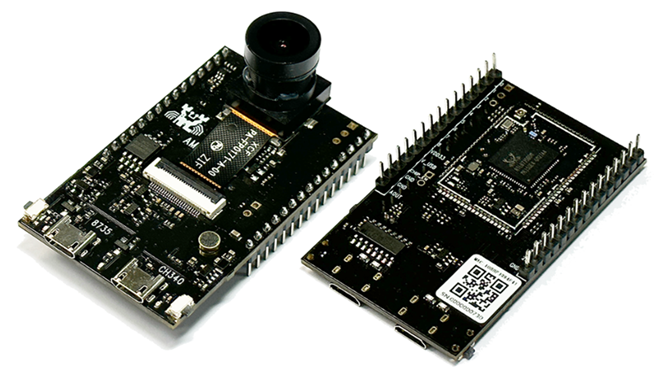
圖片來源:https://www.amebaiot.com/zh/amebapro2-2/#rtk_amb82_mini -
Ameba 開發環境建置
【Arduino編輯器 】
1.請前往以下的網址下載 Arduino 編輯器,選用 Windows 版本。
https://support.arduino.cc/hc/en-us/articles/360019833020-Download-and-install-Arduino-IDE
2.在您的 Windows 電腦上安裝 Arduino 編輯器,按照提示的步驟進行安裝程序。
【USB 驅動程式】
1.請前往以下的網址下載 USB 驅動程式,下載後將檔案解壓。
http://www.wch-ic.com/downloads/CH341SER_ZIP.html
2.在解壓縮後的資料夾中,執行「Setup.exe」程式,按照提示的步驟進行安裝程序。
-
Ameba 開發環境簡介
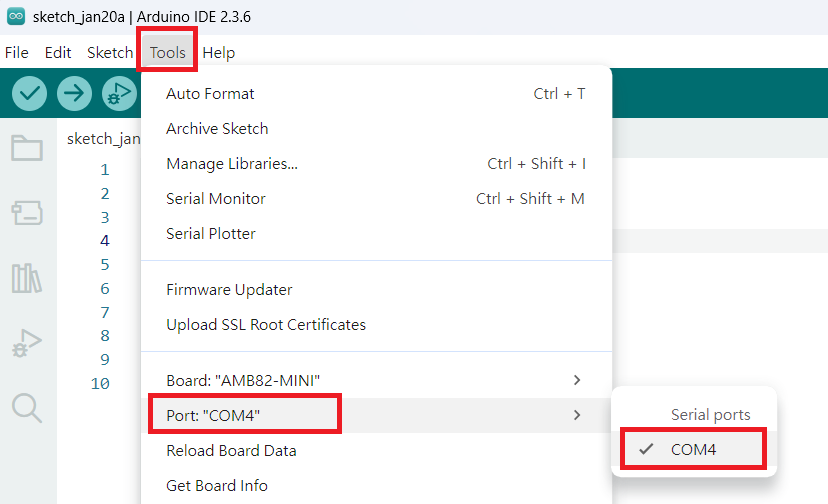
1. 打開上一單元安裝的 Arduino 開發環境,將 Ameba 開發板(CH340)透過 USB 傳輸線(Type A)連結到 Windows 主機。
2.在Arduino 編輯器中確認 Ameba 是否有連接到 Windows 主機的通訊埠。
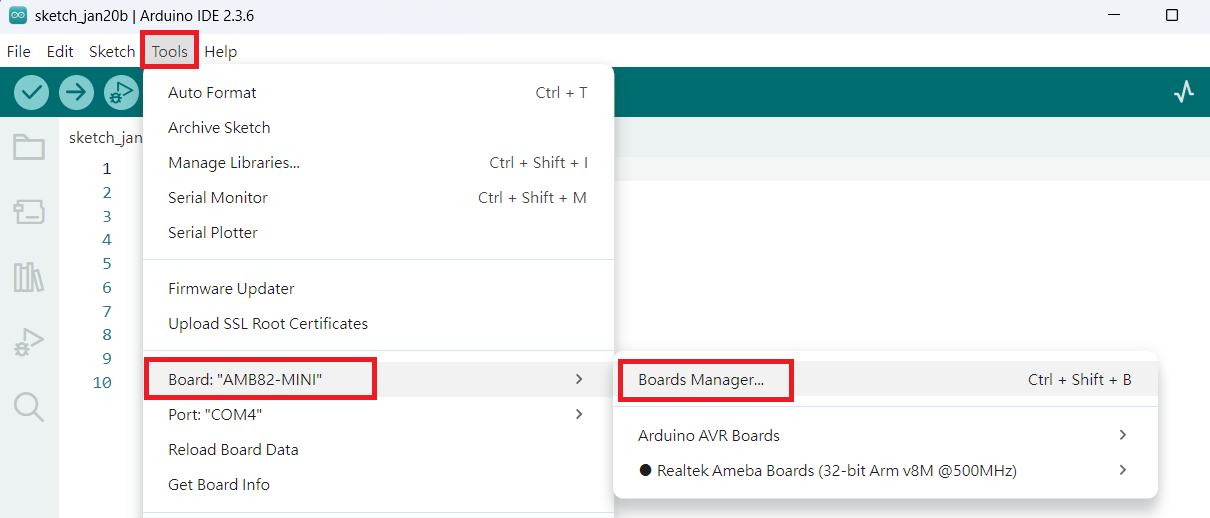
3.在Arduino 編輯器中,選擇「Tools-Boards:-Boards Manager」。
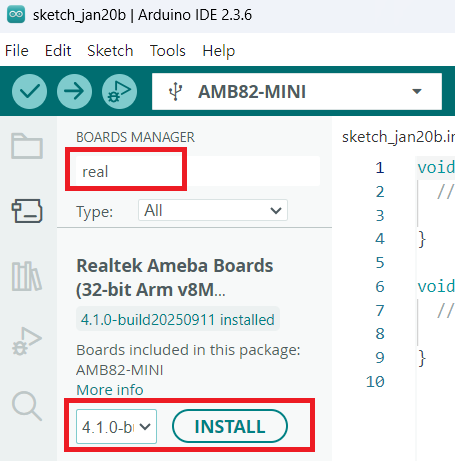
4.在左側選單中,搜尋「real 」,在出現的「Realtek Ameba Boards」選項中,選擇某一個版本後,按下「Install」按鈕進行安裝。
-
Ameba 基本元件介紹
【鏡頭】
在開發板背面,有一個可以裝攝影鏡頭的地方,如下:
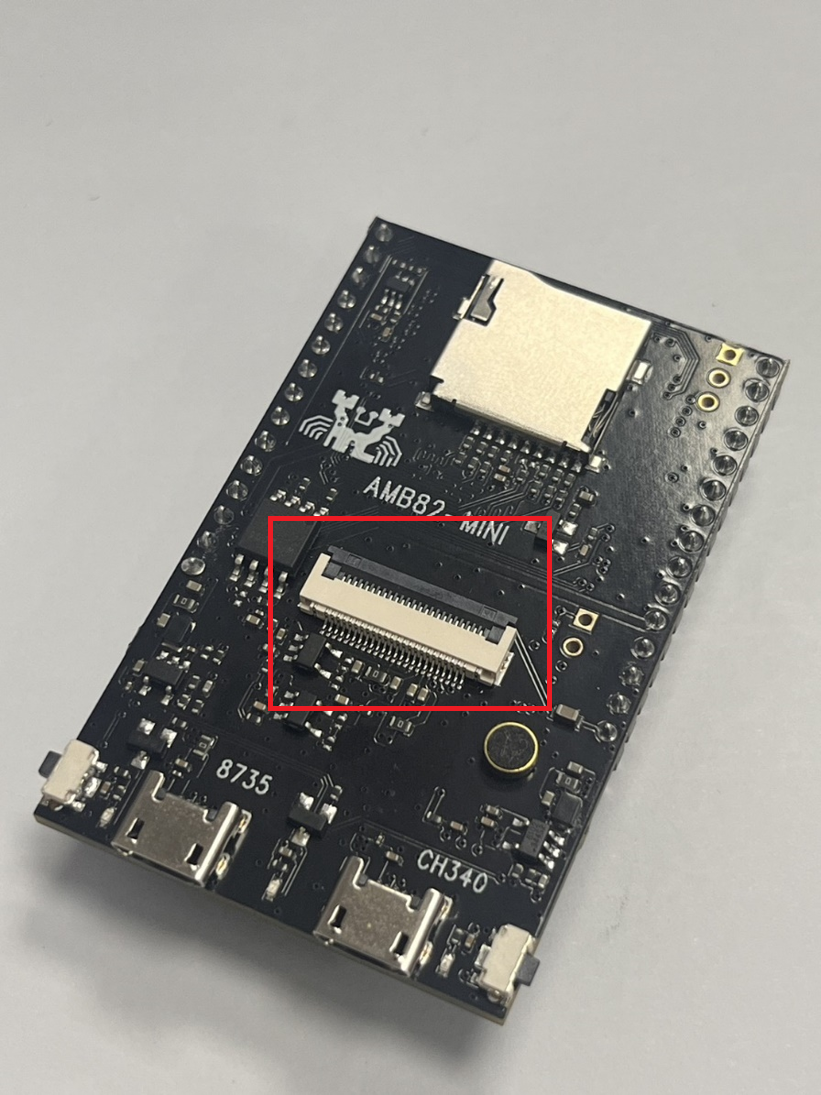
圖片來源:NTNU AIOTLab 將攝影鏡頭的連接線插入卡榫,並按下塑膠片以固定連接線,如下:
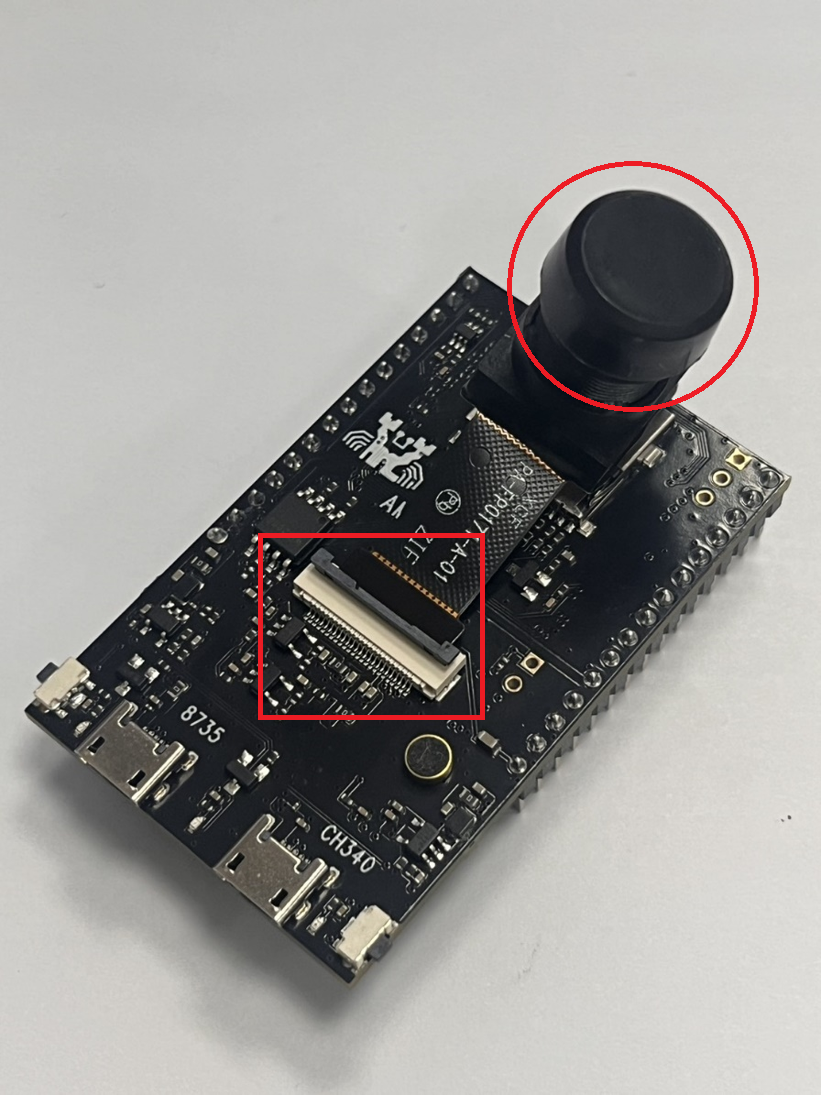
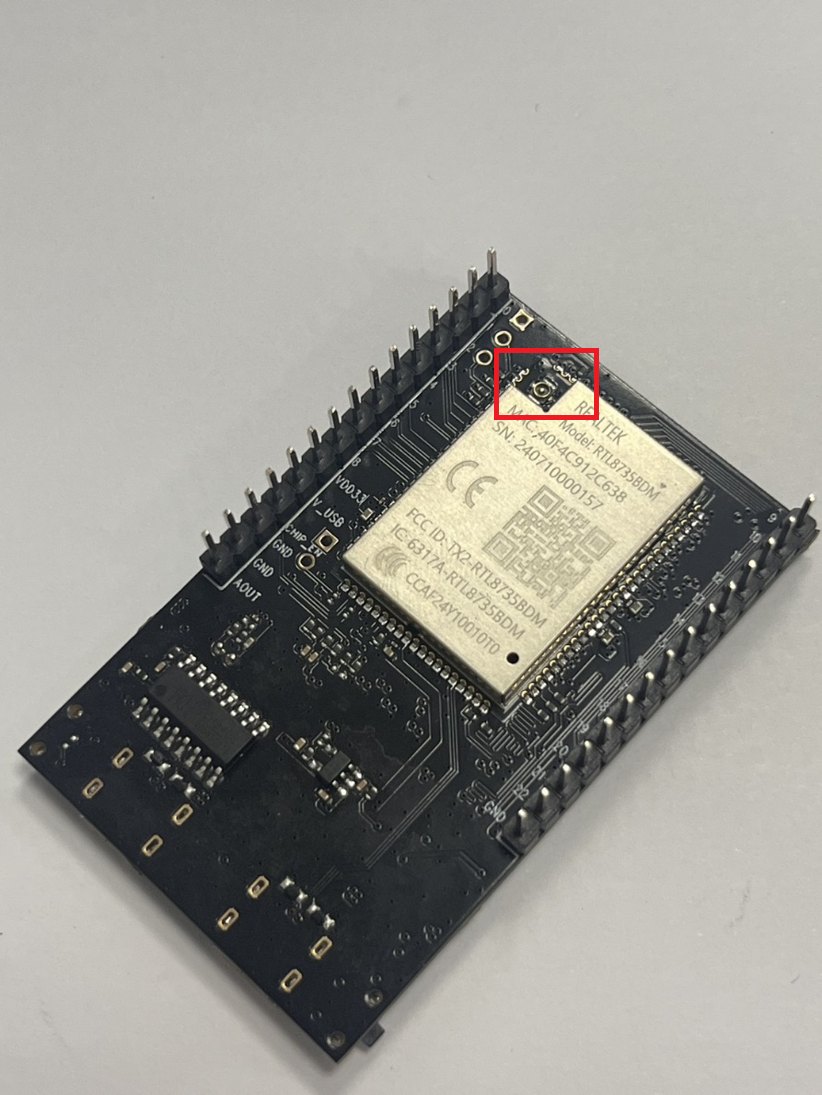
圖片來源:NTNU AIOTLab 【天線】
將Wifi天線接到 Ameba 開發板正面晶片角落的缺口,如下:
圖片來源:NTNU AIOTLab 接好後,開發板就有無線網路的功能,如下:
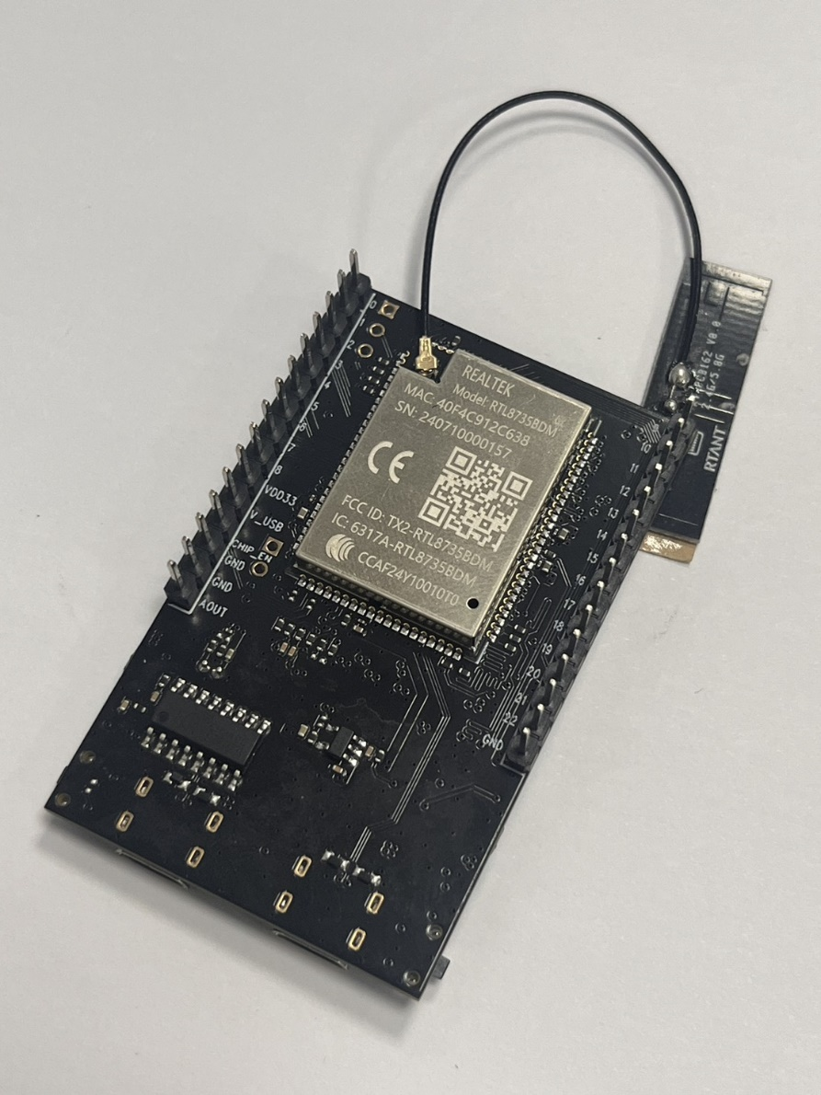
圖片來源:NTNU AIOTLab -
C-like 程式燒錄操作步驟
1.透過 USB 傳輸線連接到 Ameba 的 Micro USB 端口( CH340) 。
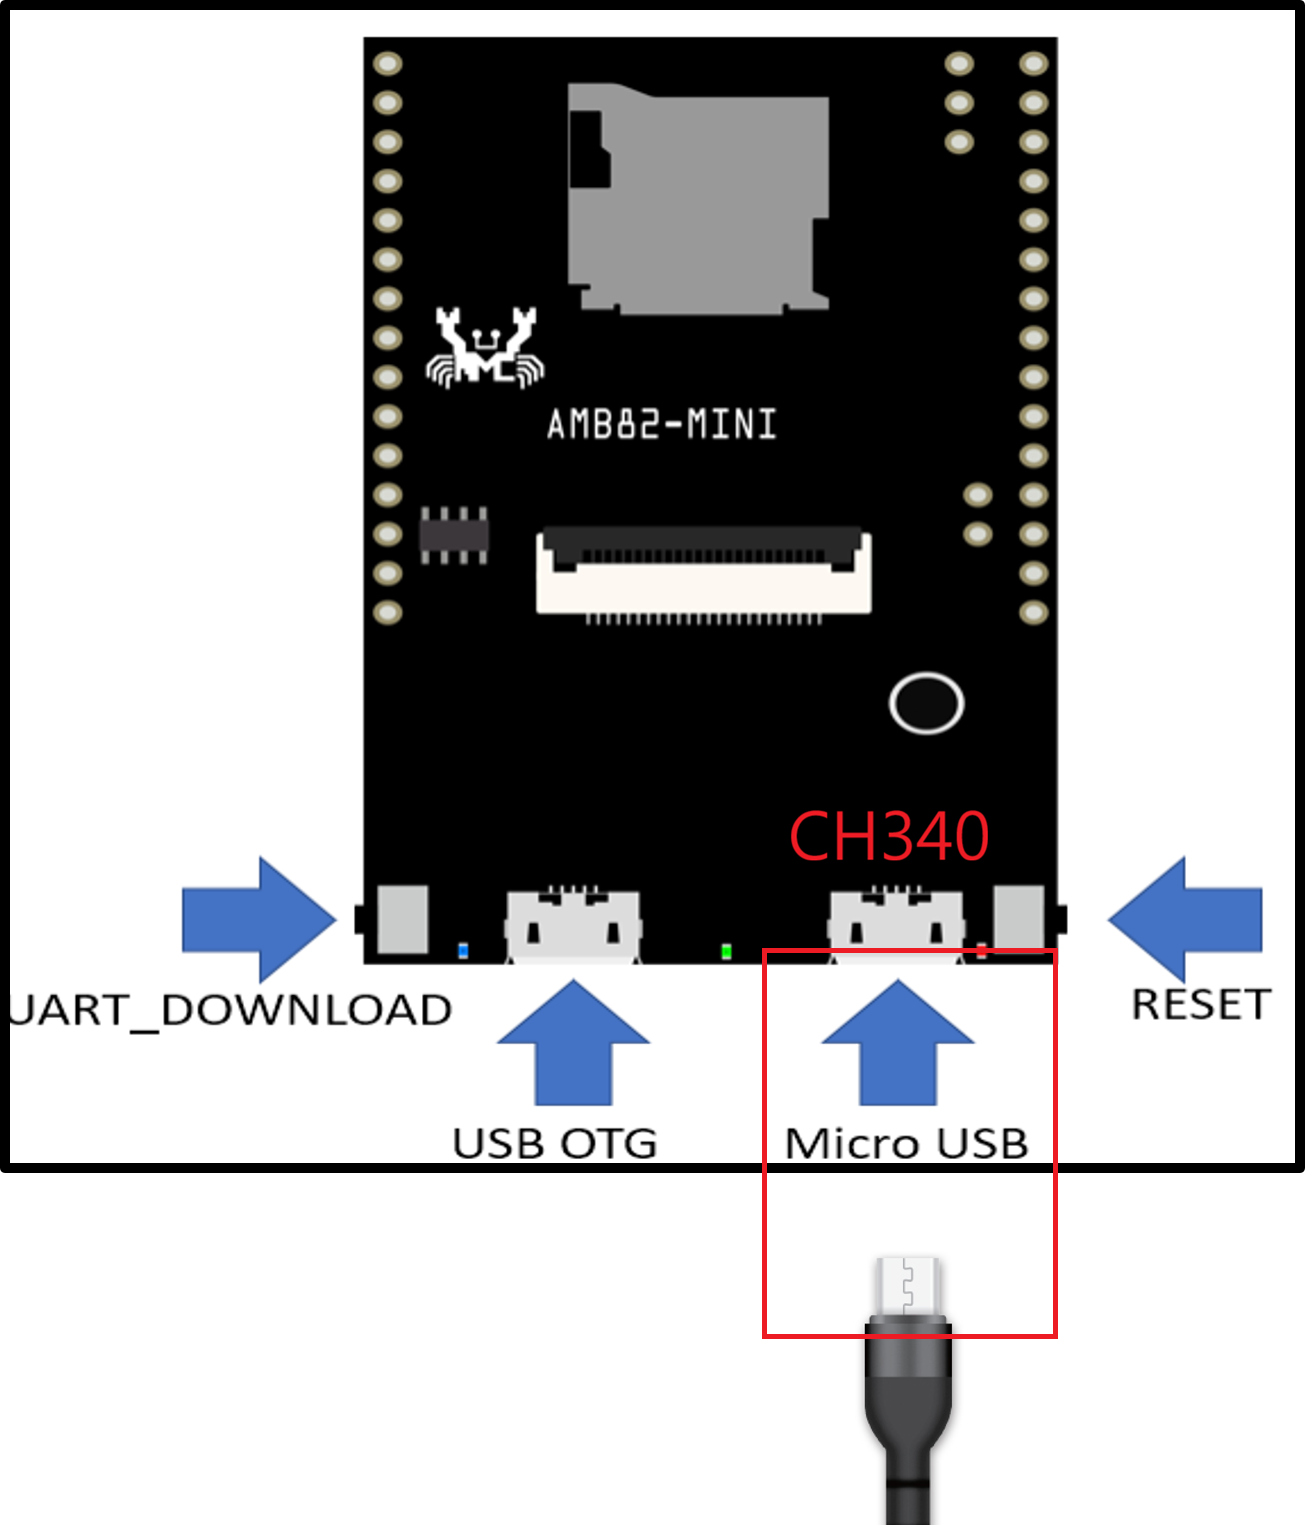
圖片來源:NTNU AIOTLab 2. 透過 USB 傳輸線連接到電腦。
3. 設定 Ameba 開發板為程式傳輸狀態。
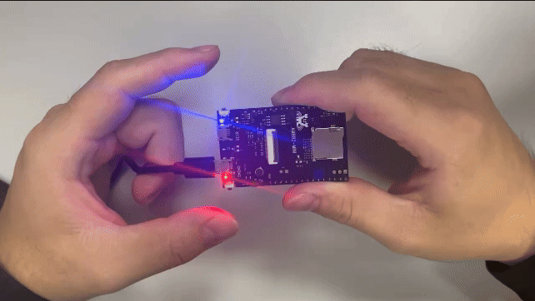
首先,持續按住 UART_DOWNLOAD 按鈕,然後按一下 RESET 按鈕。最後,放開 UART_DOWNLOAD 按鈕。
圖片來源:NTNU AIOTLab 4. 在 Arduino 開發環境中,撰寫以下的程式。
/*
  Blink

  Turns an LED on for one second, then off for one second, repeatedly.

  Most Arduinos have an on-board LED you can control. On the UNO, MEGA and ZERO
  it is attached to digital pin 13, on MKR1000 on pin 6. LED_BUILTIN is set to
  the correct LED pin independent of which board is used.
  If you want to know what pin the on-board LED is connected to on your Arduino
  model, check the Technical Specs of your board at:
  https://docs.arduino.cc/hardware/

  modified 8 May 2014
  by Scott Fitzgerald
  modified 2 Sep 2016
  by Arturo Guadalupi
  modified 8 Sep 2016
  by Colby Newman

  This example code is in the public domain.

  https://docs.arduino.cc/built-in-examples/basics/Blink/
*/

// the setup function runs once when you press reset or power the board
void setup() {
  // initialize digital pin LED_BUILTIN as an output.
  pinMode(LED_BUILTIN, OUTPUT);
}

// the loop function runs over and over again forever
void loop() {
  digitalWrite(LED_BUILTIN, HIGH);  // turn the LED on (HIGH is the voltage level)
  delay(1000);                      // wait for a second
  digitalWrite(LED_BUILTIN, LOW);   // turn the LED off by making the voltage LOW
  delay(1000);                      // wait for a second
}
5. 在 Arduino 開發環境中,按下 Upload 按鈕。

圖片來源:NTNU AIOTLab 6. 若是程式成功地燒錄並上傳到 Ameba 開發板,再次按下 Reset 按鈕就可以執行程式。
-
Ameba 開發環境建置